Dream Audio Analyzer
Introduction
This guide uses the Dream Audio Analyzer plugin as an example and walks through the full workflow from installation to UI display.
Before getting started, first understand the three analysis modes supported by the plugin:
- LKFS (5.7+): An international loudness standard unit used to measure overall loudness precisely.
- ConstantQ: A time-frequency analysis method that better matches human hearing, with more balanced frequency resolution.
- Loudness: Computes and monitors perceived loudness, commonly used for loudness normalization and mix matching.
The corresponding settings classes are:
| Analysis Mode | Settings Class |
|---|---|
| ConstantQ | ConstantQSettings |
| LKFS | LKFSSettings |
| Loudness | LoudnessSettings |
Installation
- Download the plugin and extract it to your project's
Pluginsdirectory (ignore this if installed through FAB). - Open the project in the editor.
- Open the Plugins window:
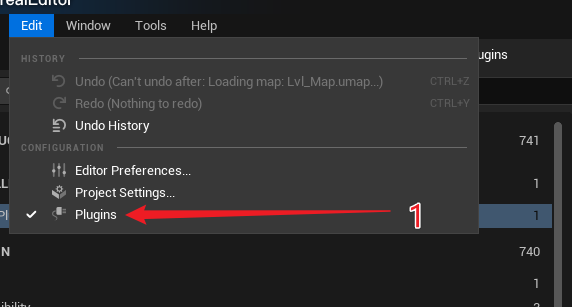
- Check and enable the
Dream Audio Analyzerplugin:
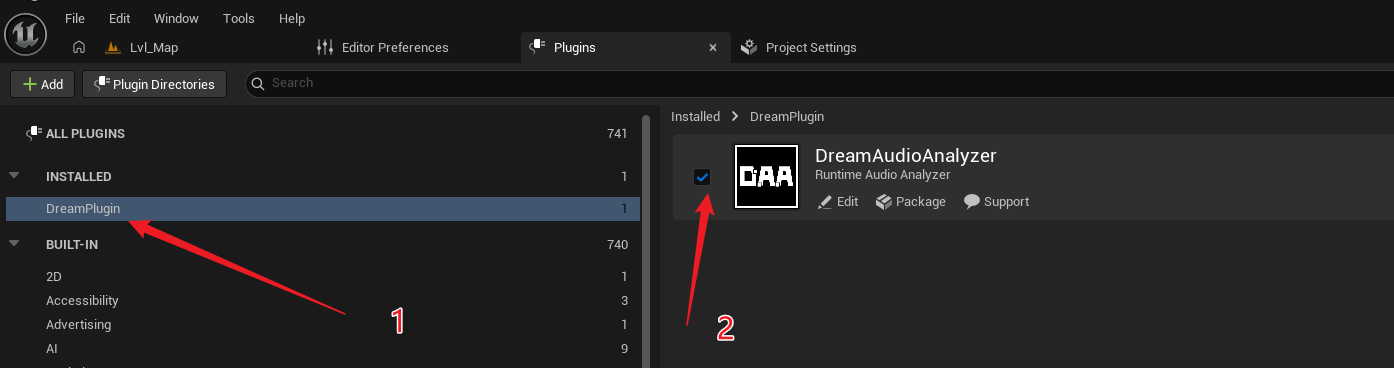
- Restart the editor when prompted to ensure the plugin modules load correctly.
Usage Steps
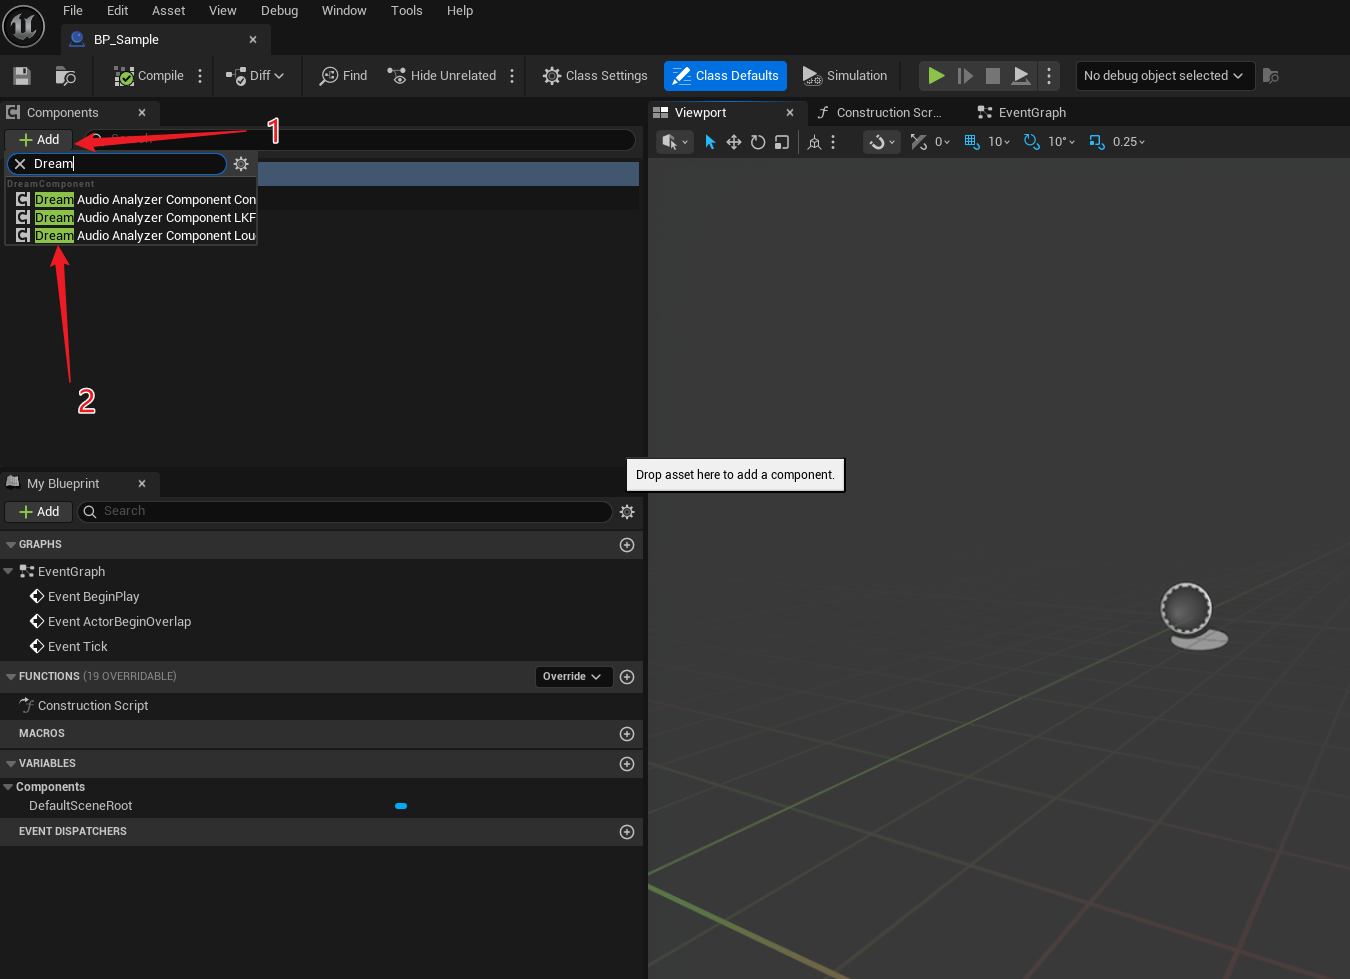
Add a DreamAudio Analysis Component
- In your Blueprint, click
Add. - Choose the analysis component implementation you need:
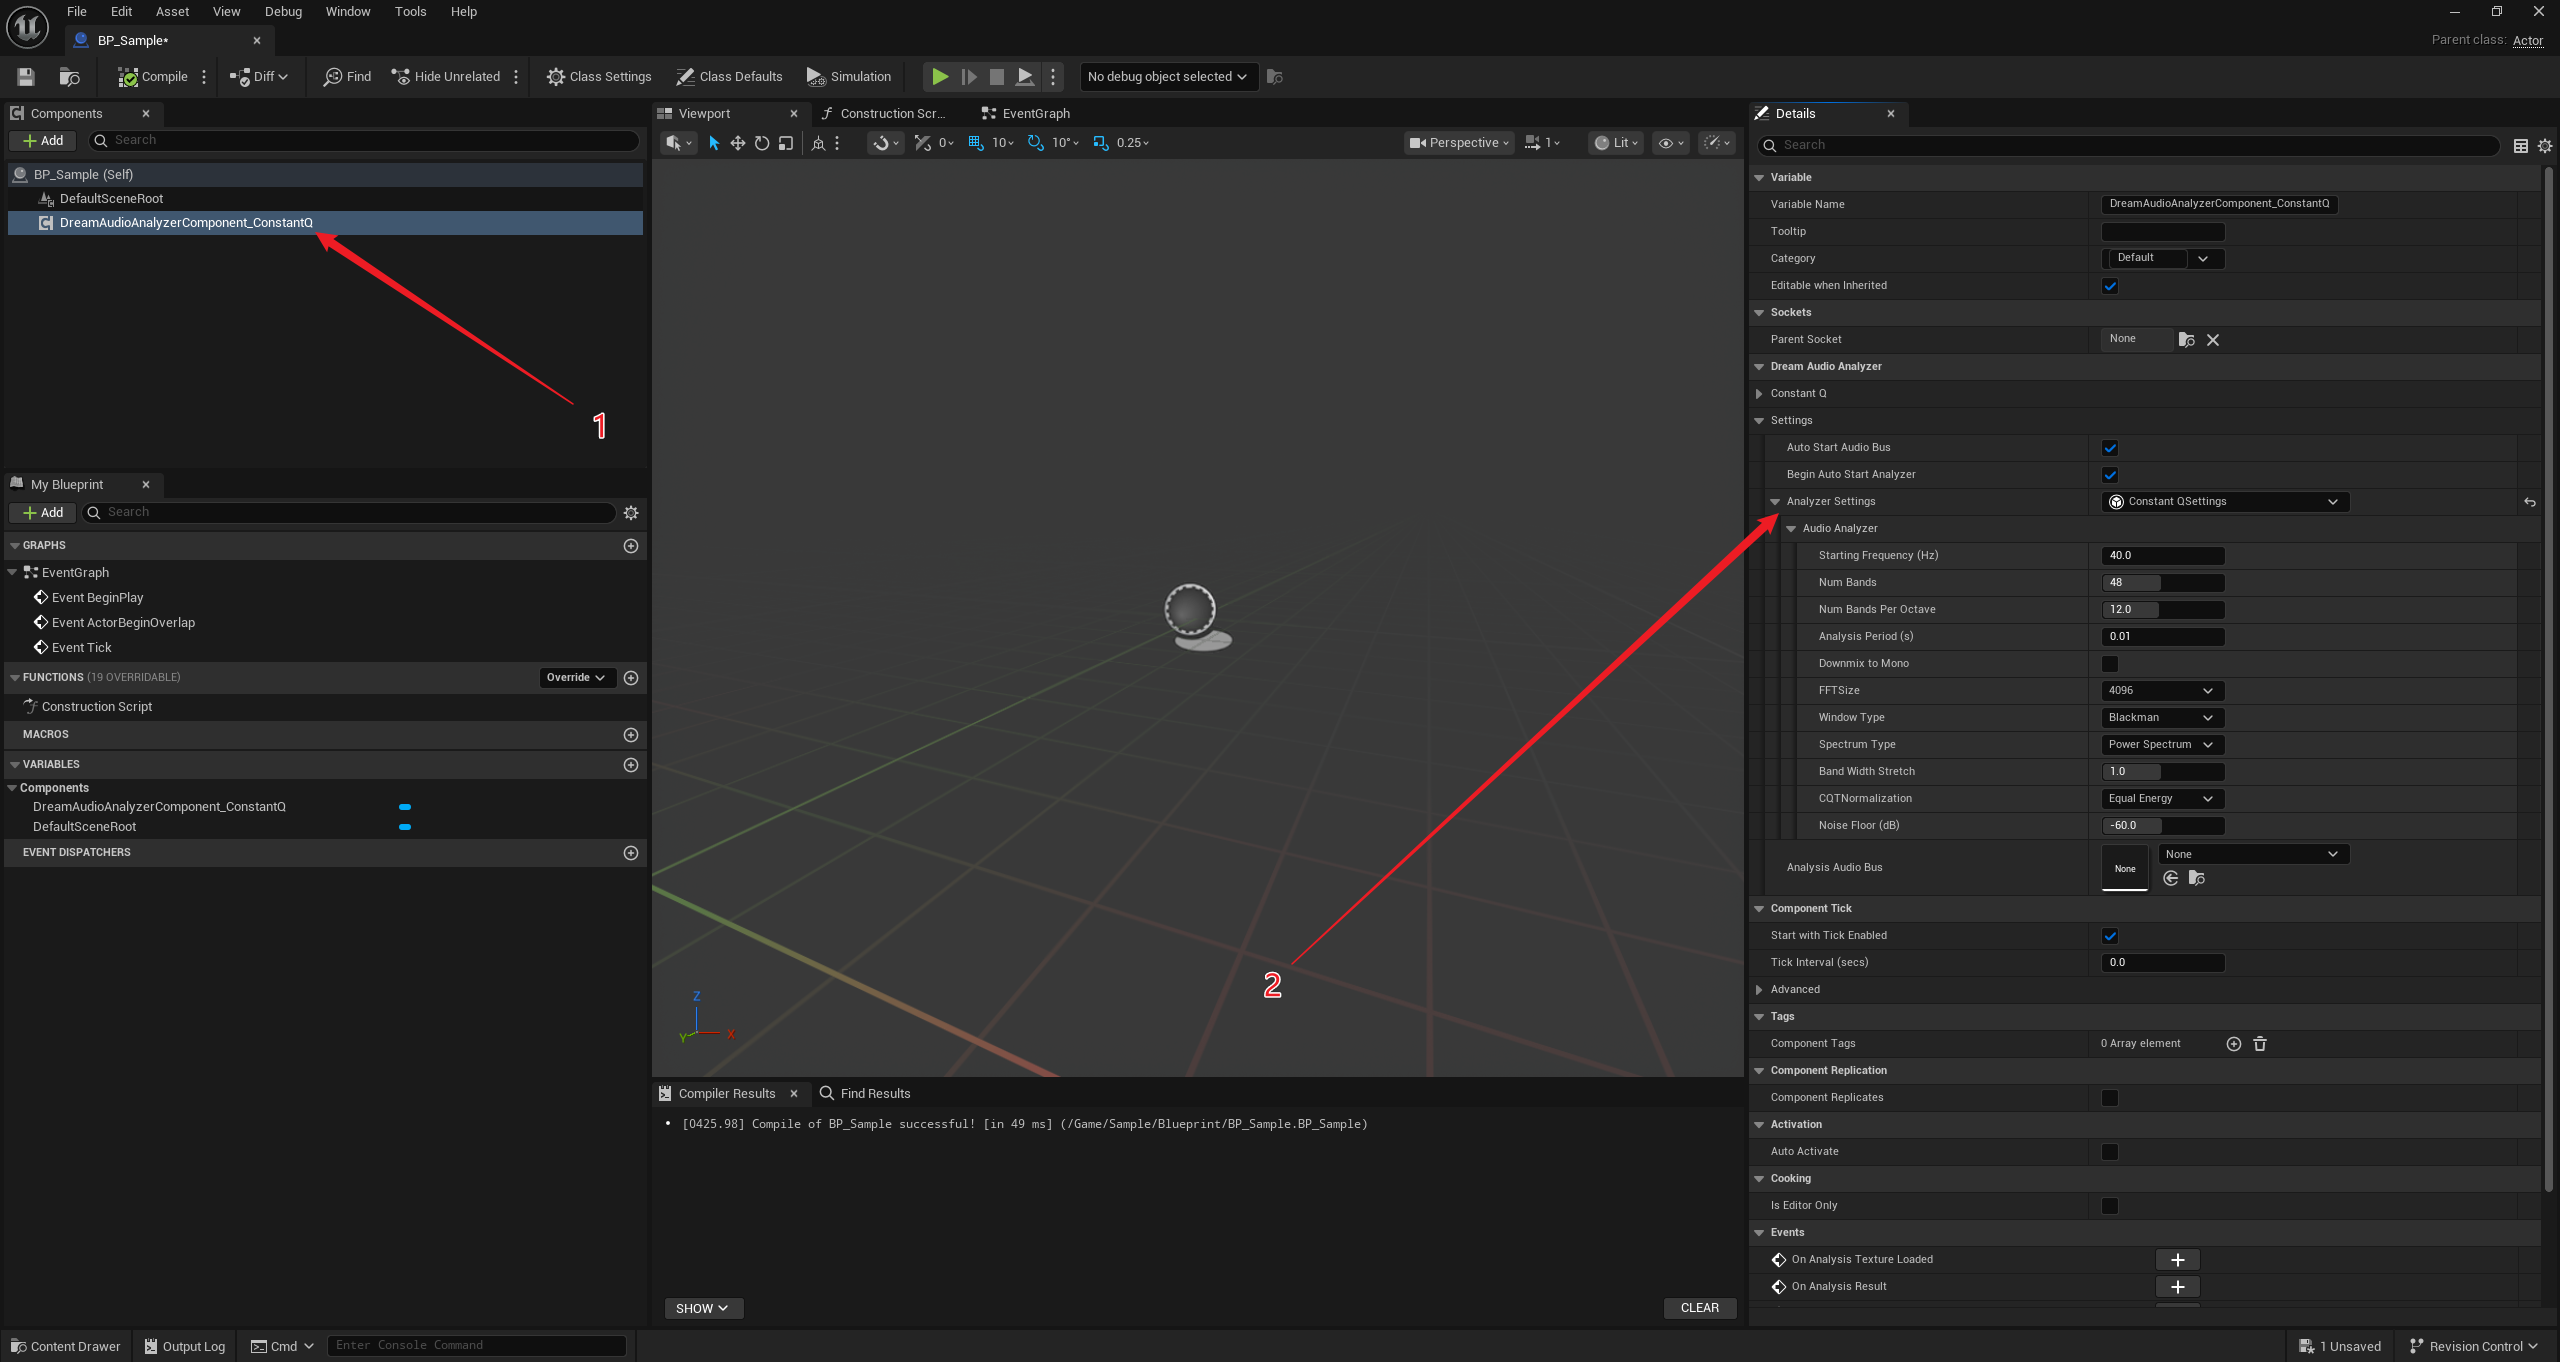
Add the Corresponding Settings
- Select the component.
- In the Properties panel, select the matching analyzer settings:
Configure the Component
- Choose the Audio Bus to analyze (you can also use your own bus).
- If using the built-in bus from the plugin, select
AB_DreamAudioListen_Channel_A:
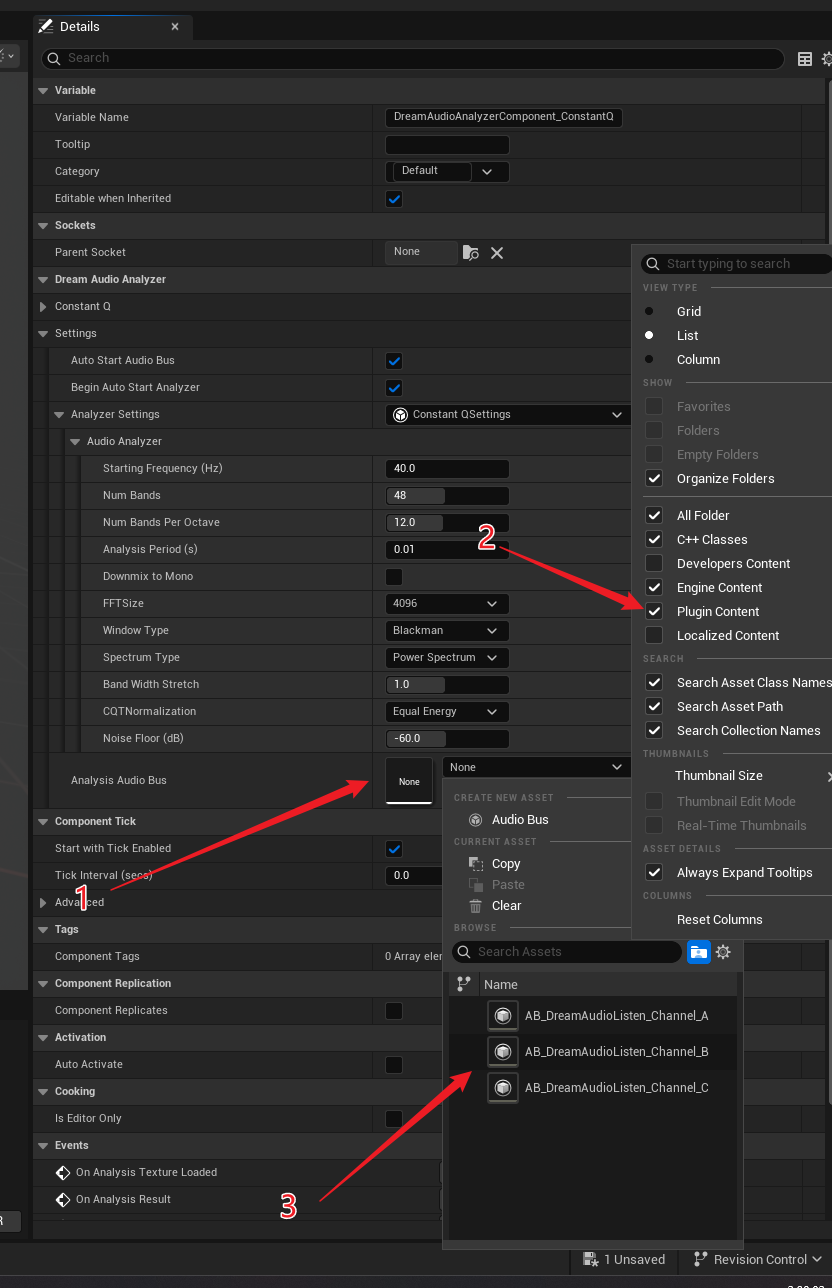
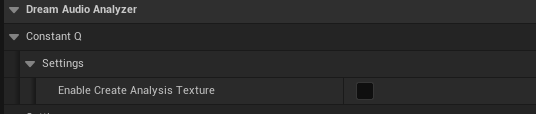
Analysis Audio Busis the bus that the component actually analyzes. As long as this bus has audio input, the component keeps producing analysis results, regardless of asset type.After enabling
Enable Create Analysis Texture, the plugin generates textures based on the Audio Bus channel count. These textures can be sampled in materials. Spectrum width and range are determined by the analysis settings.
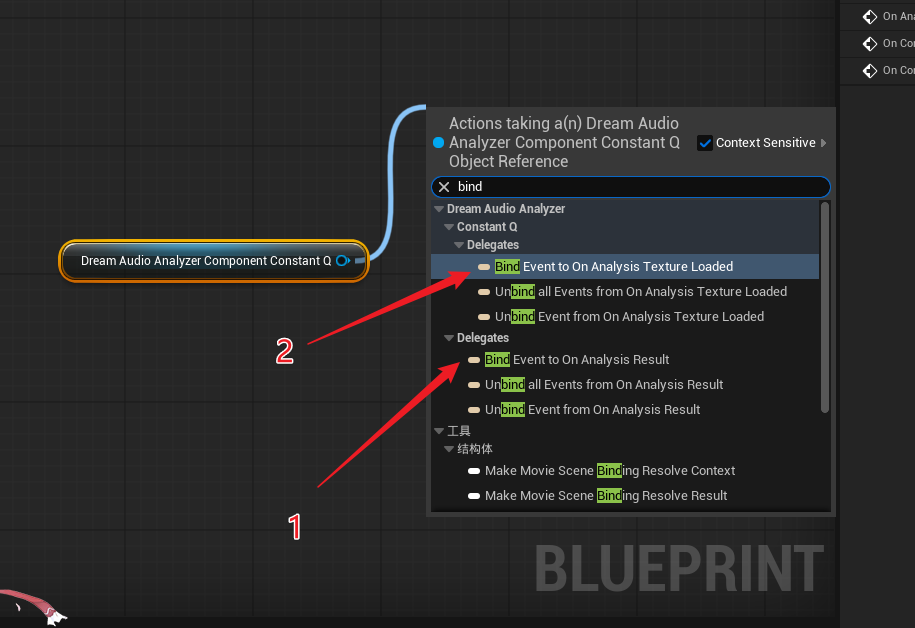
Get Analysis Results
All analysis components provide the OnAnalysisResult delegate callback.
This callback returns an FDreamAudioAnalyzerResult struct containing the analysis data supported by the current component type.
For ConstantQ analysis, there is also an OnAnalysisTextureLoaded callback, which returns dynamic textures created per audio channel. You can then sample these textures in materials for audio visualization.
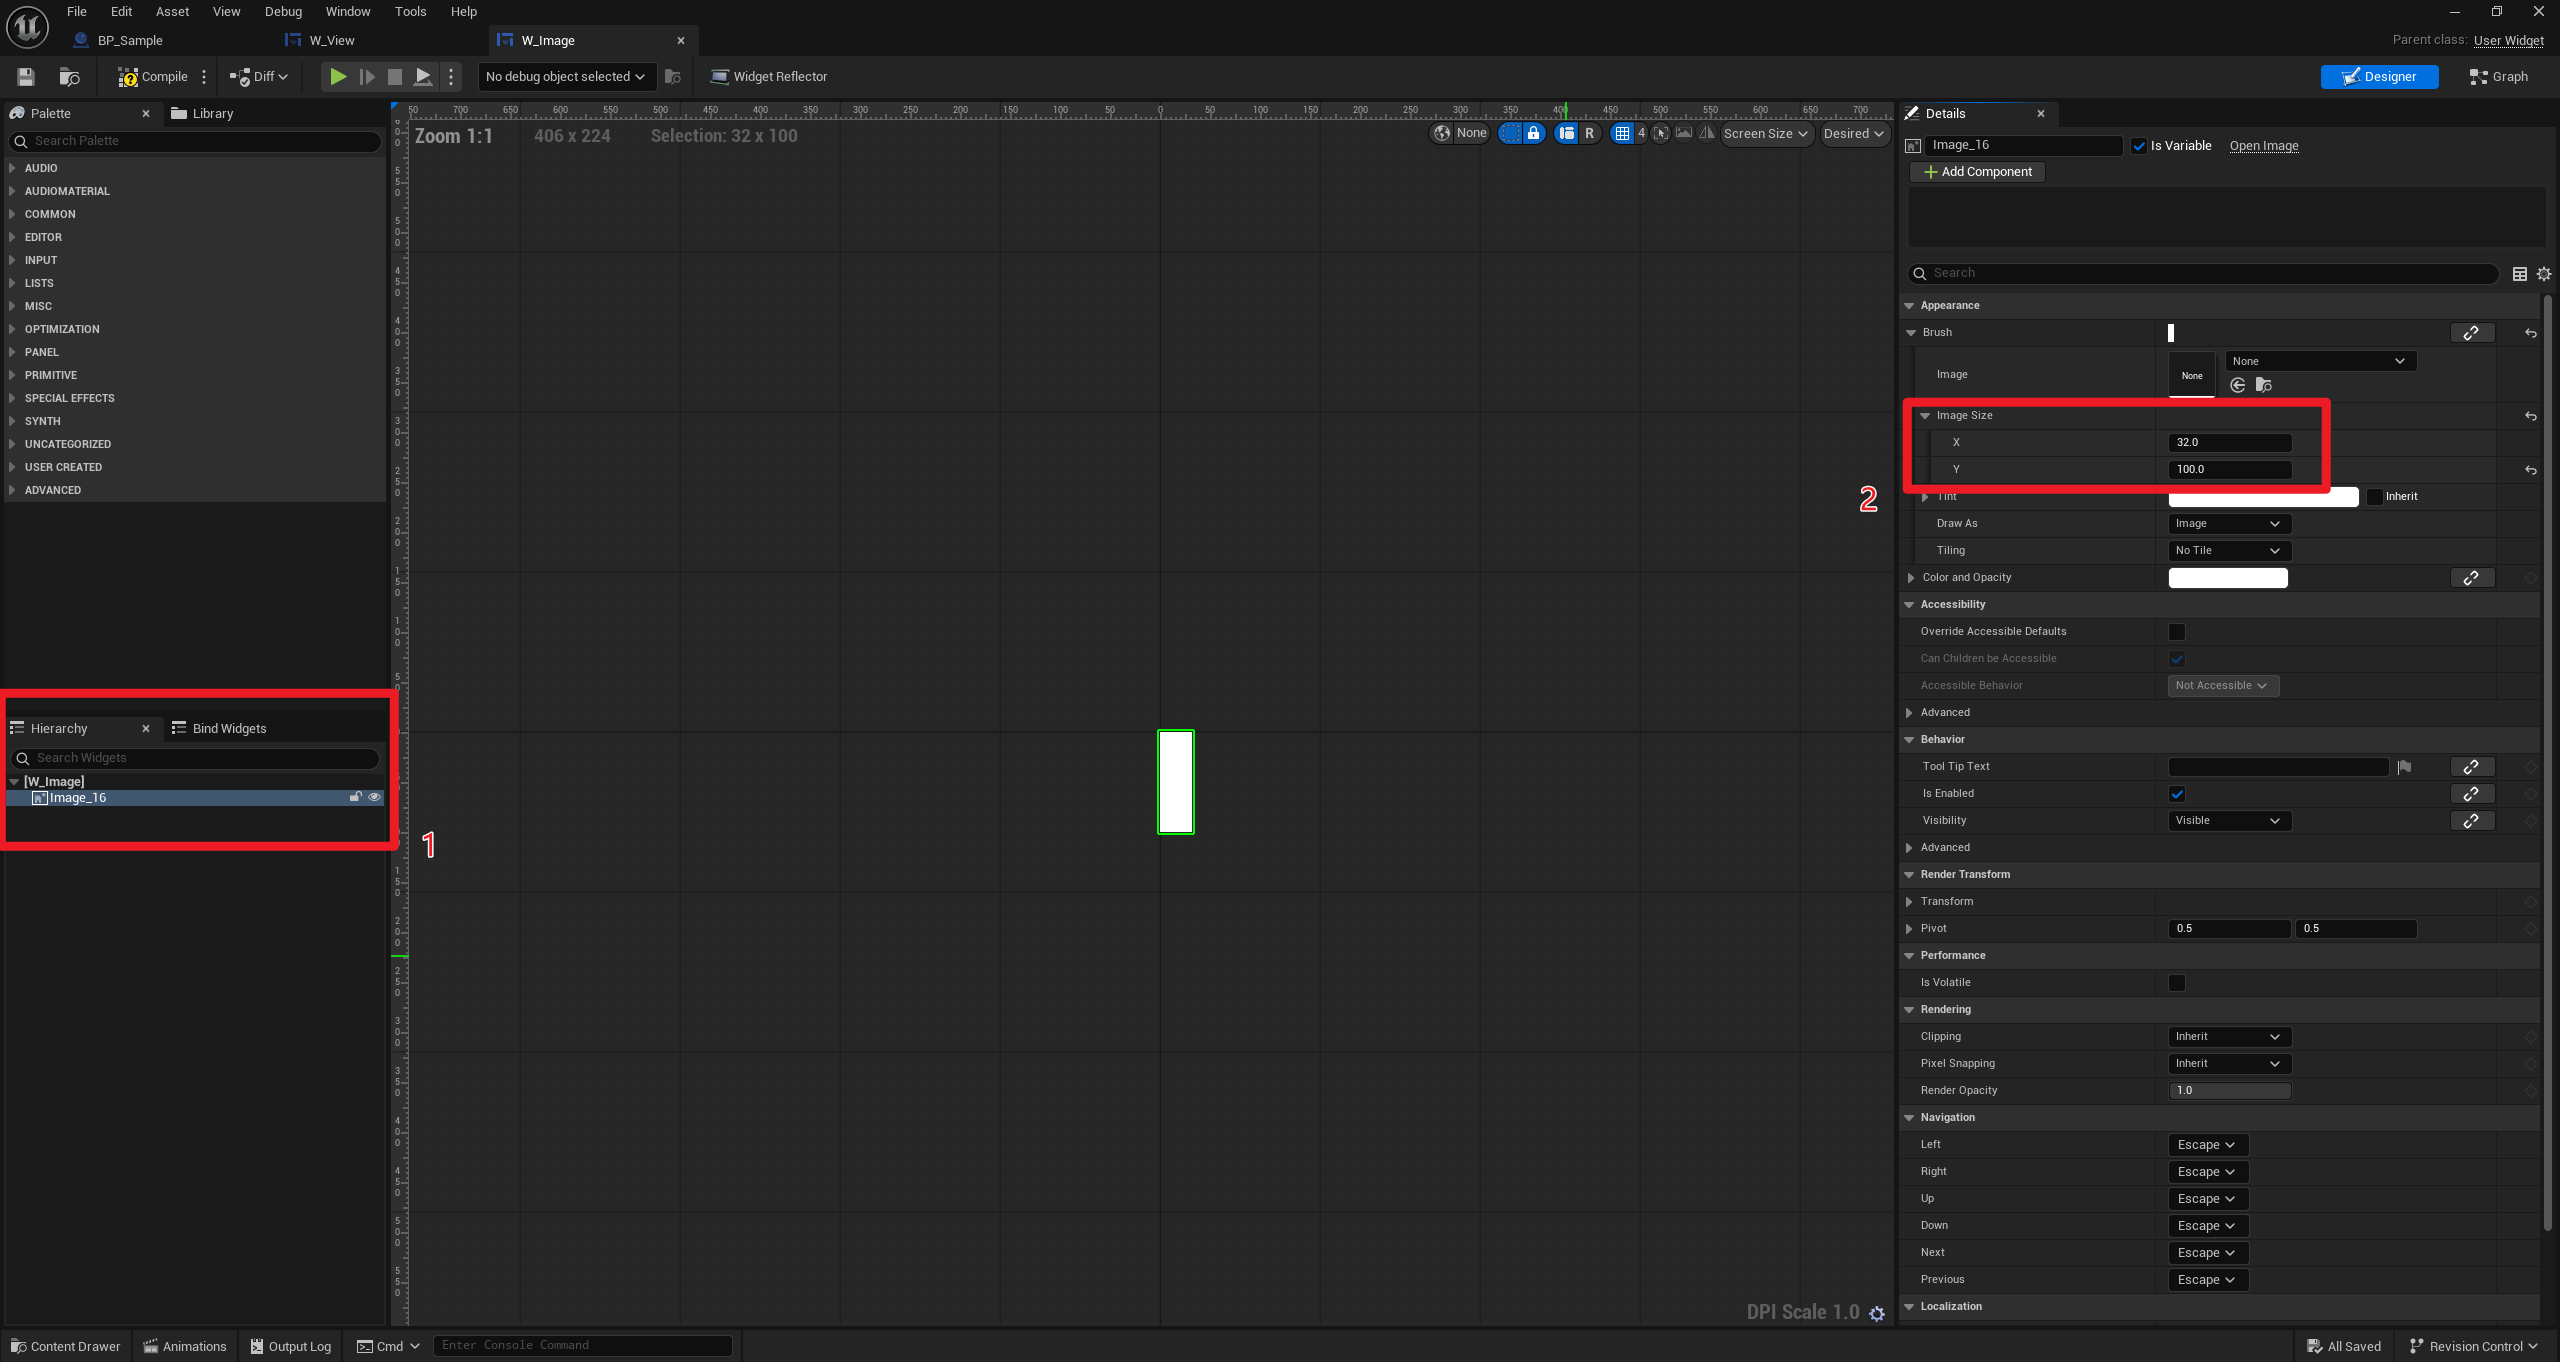
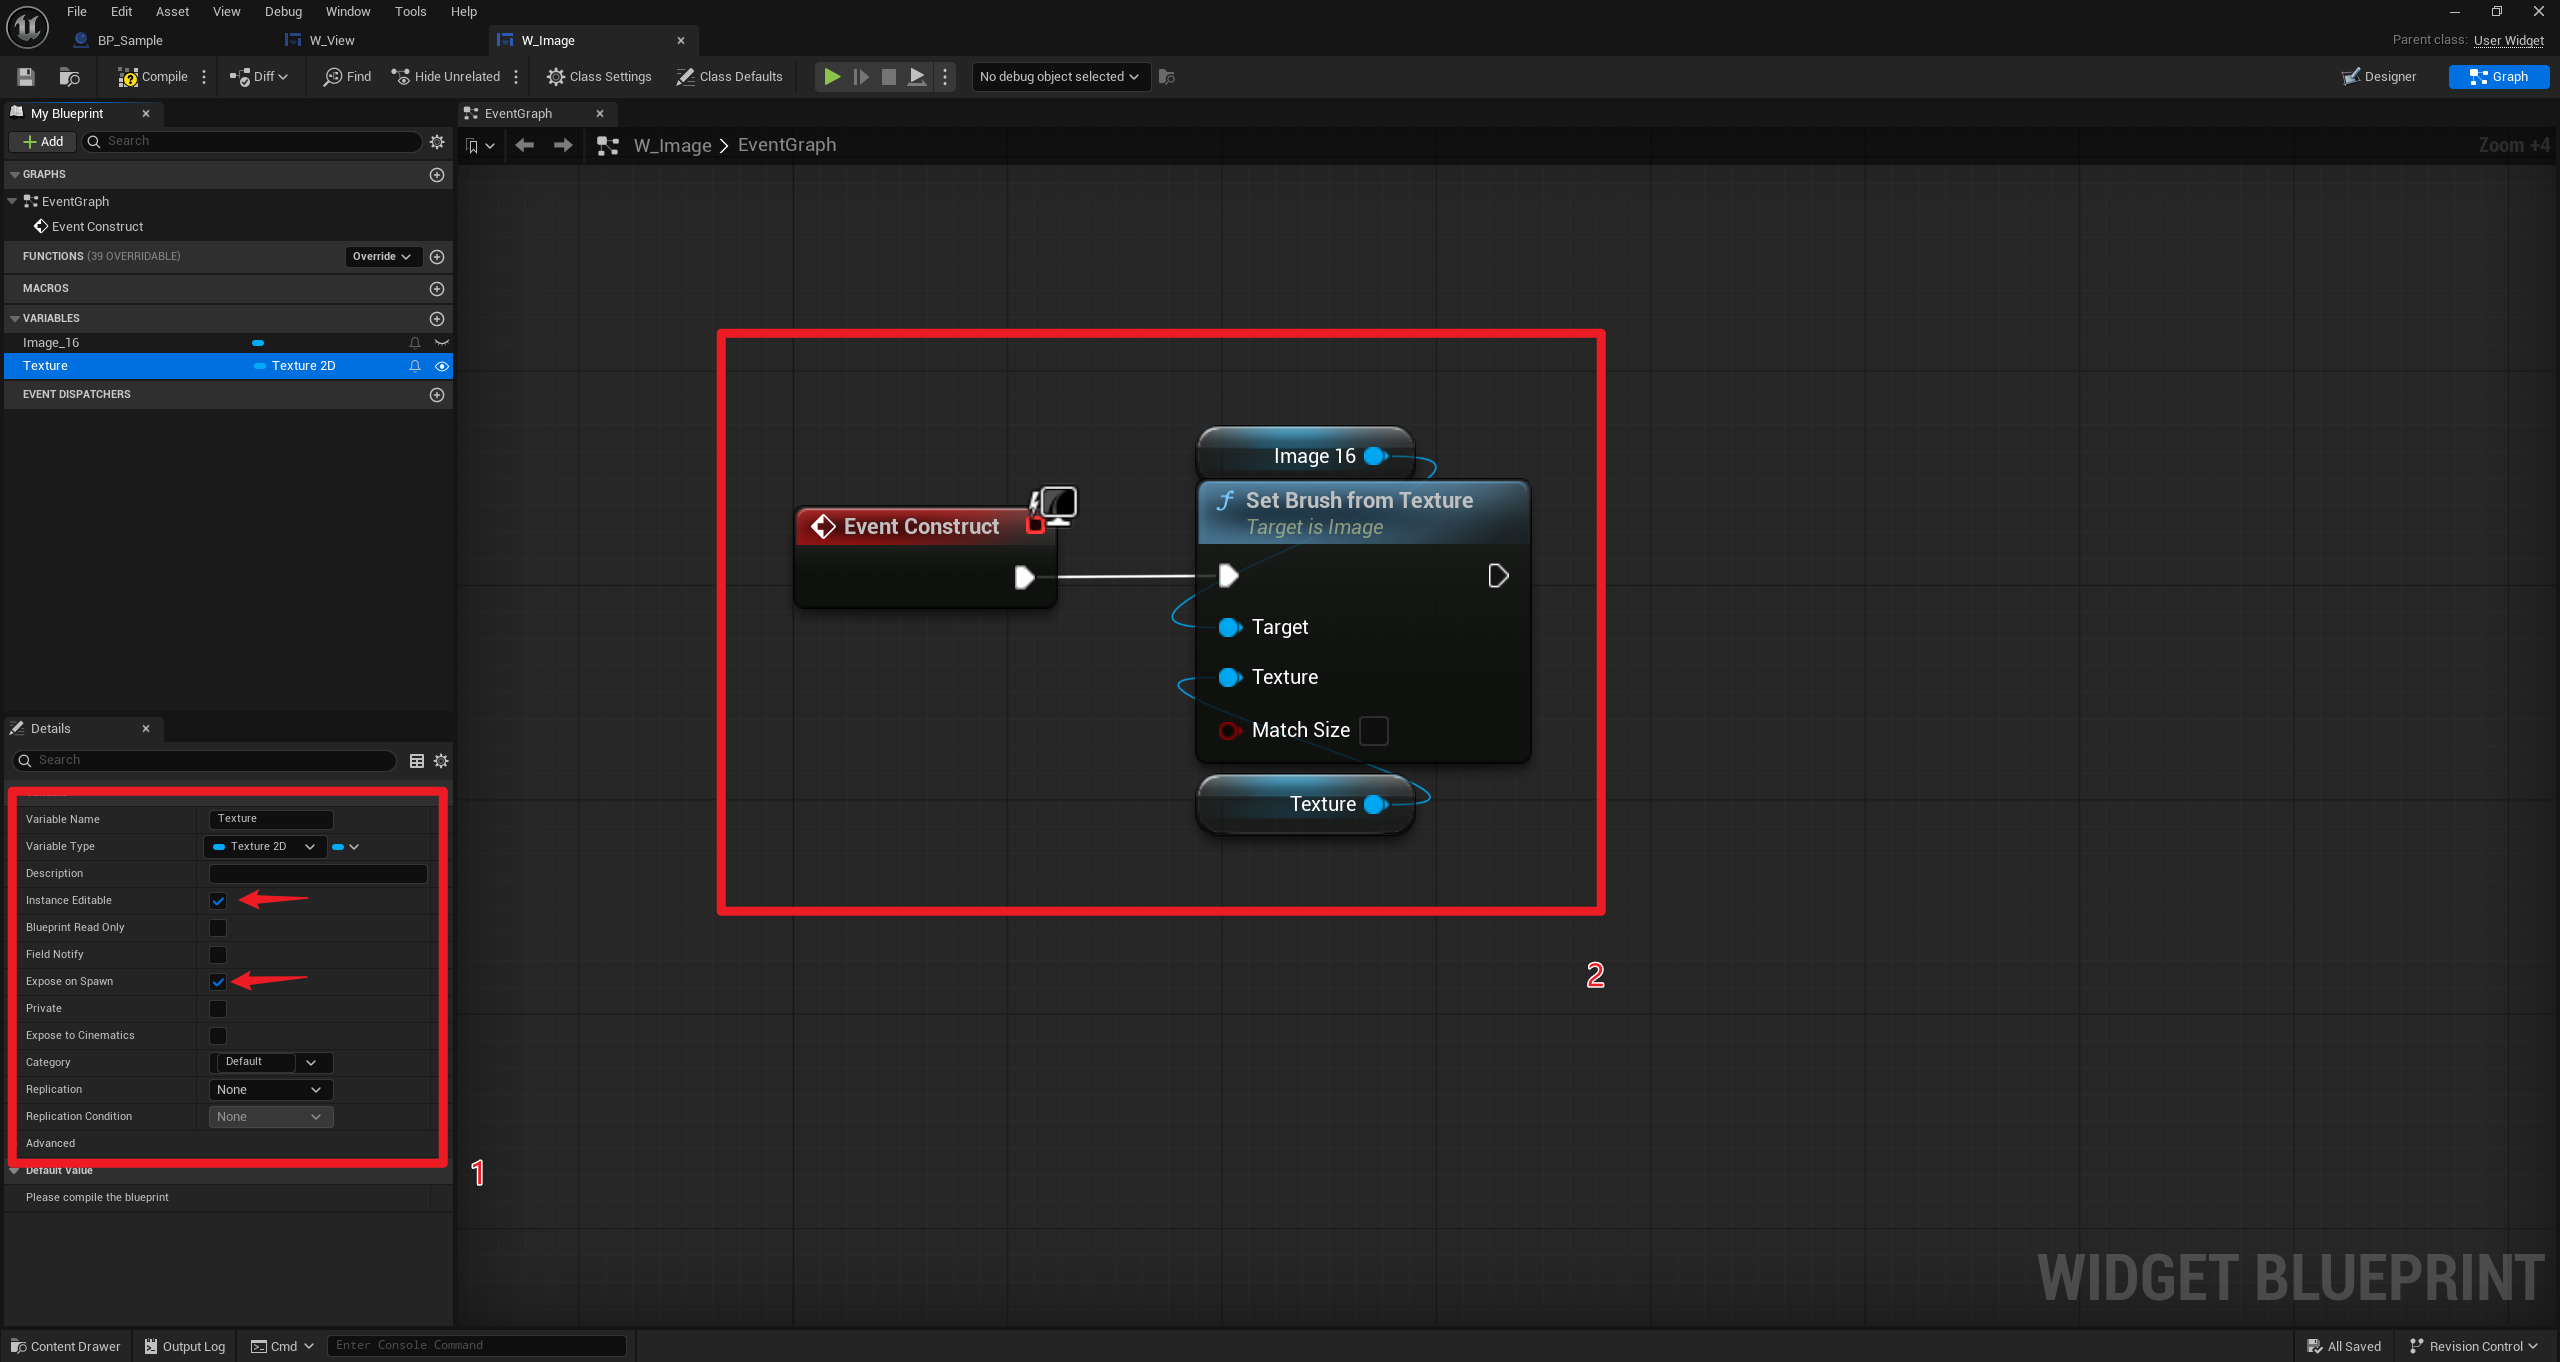
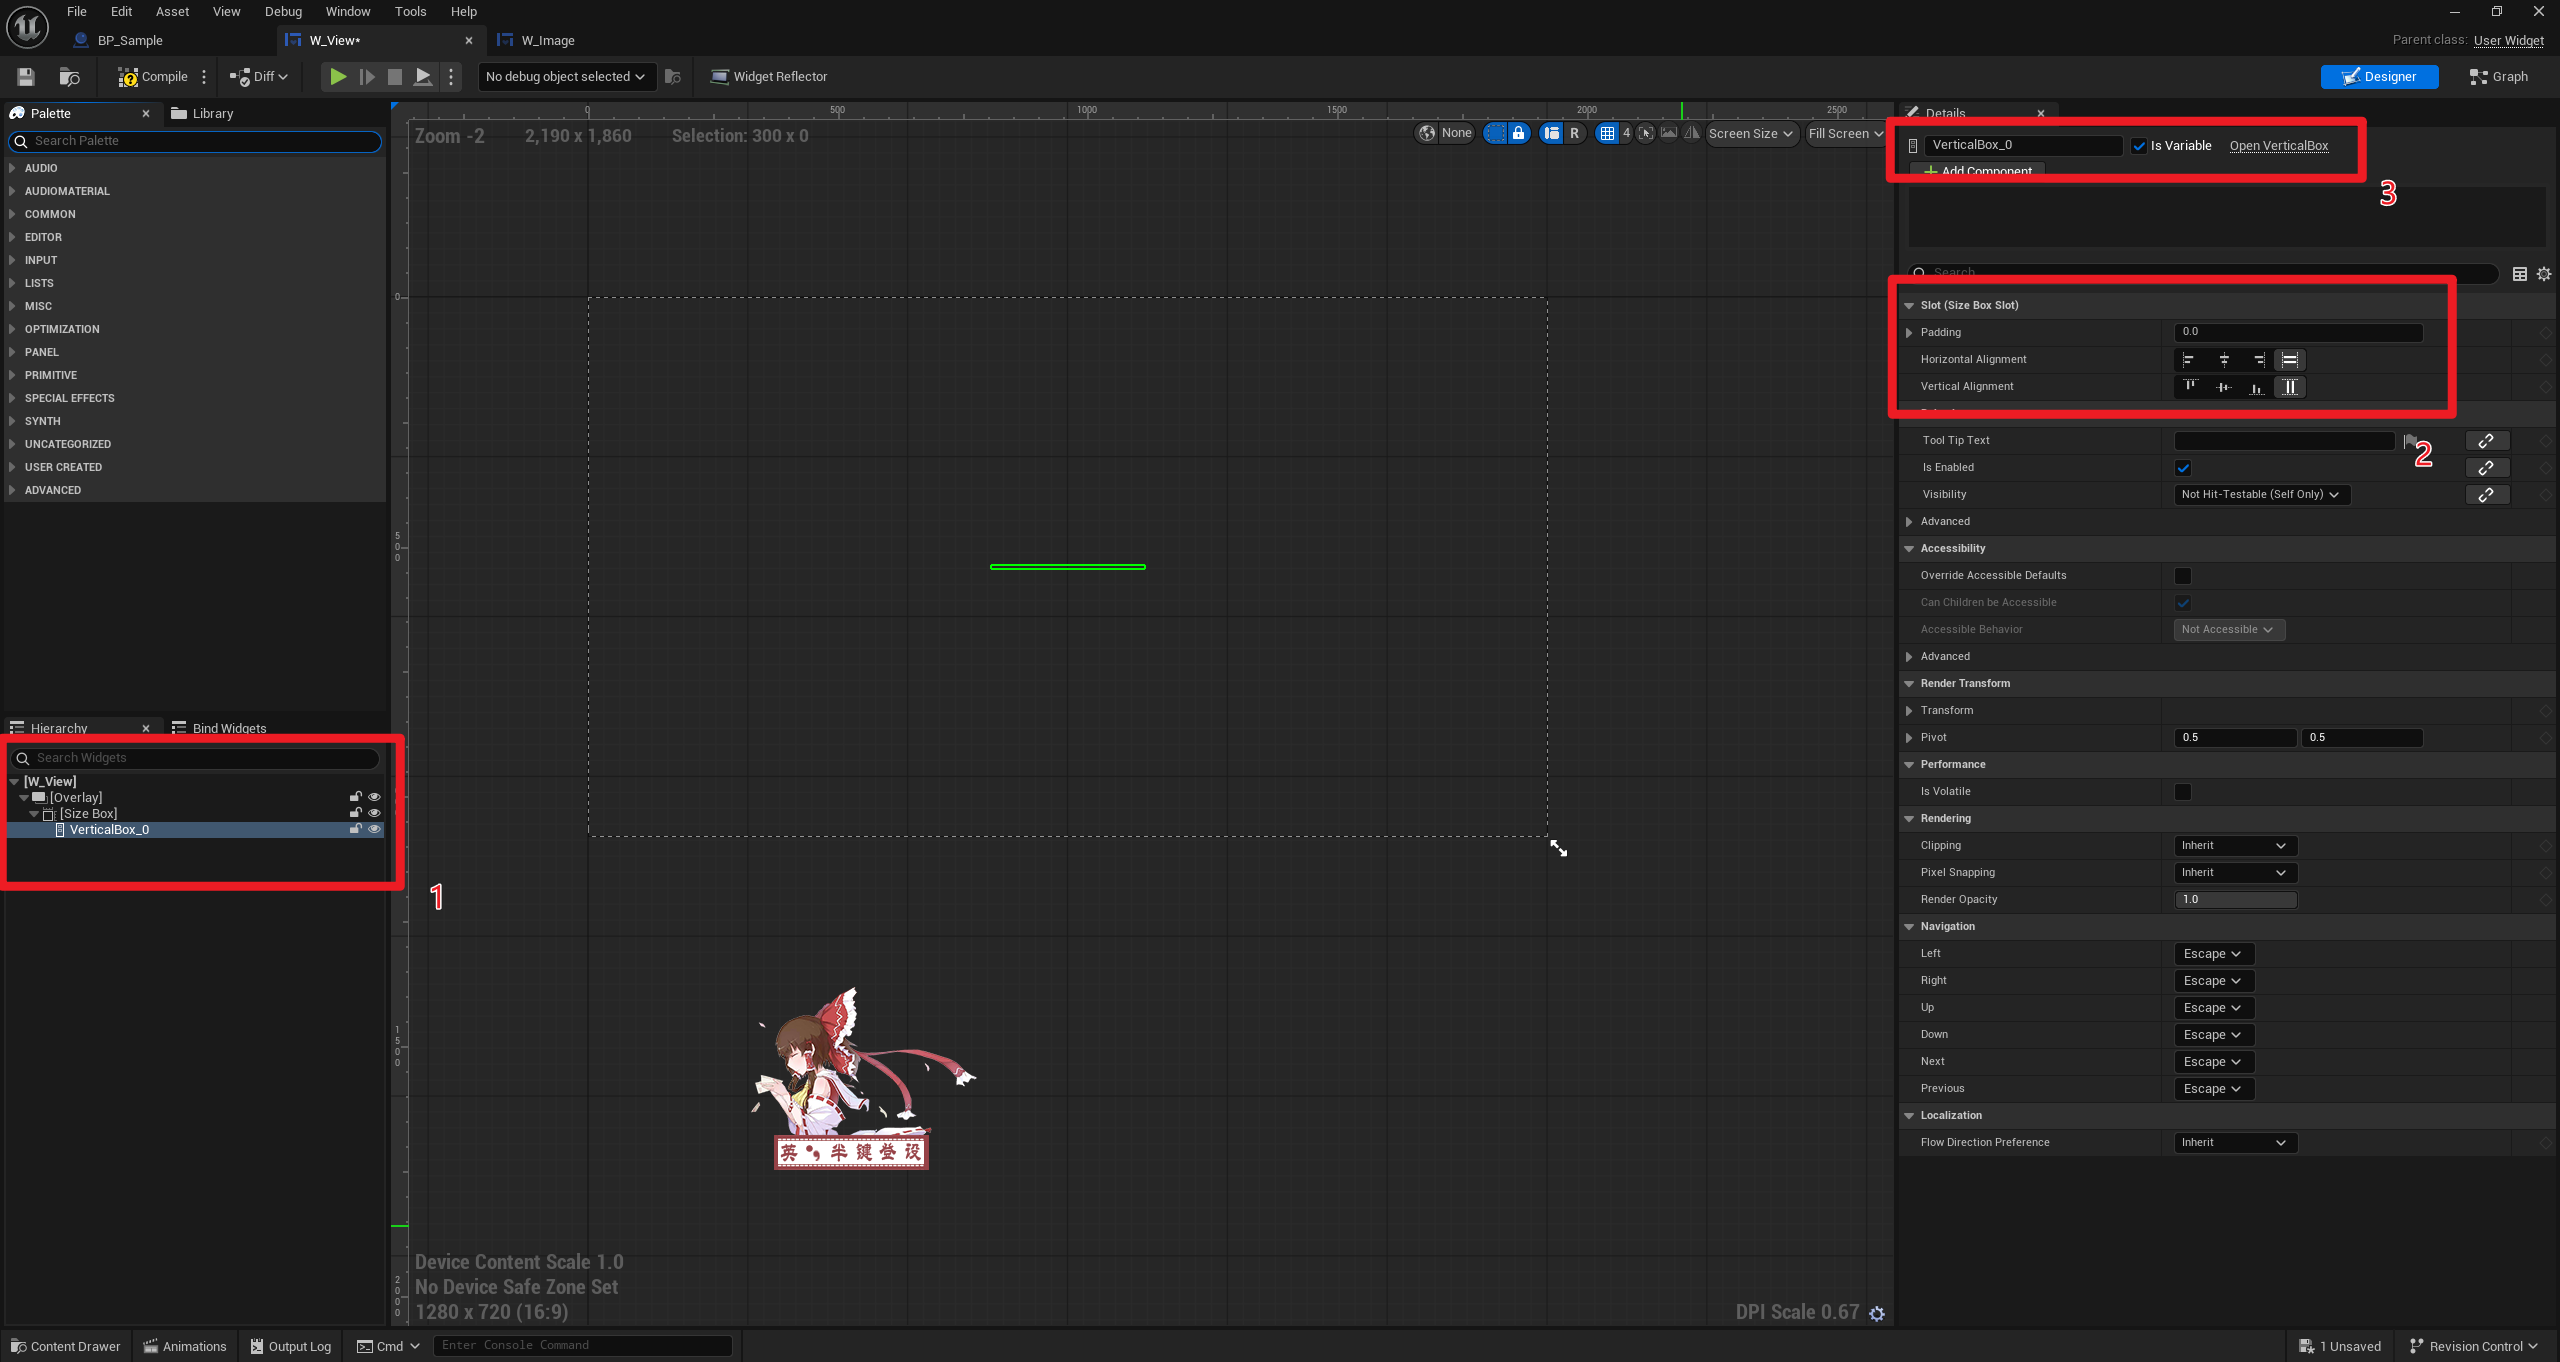
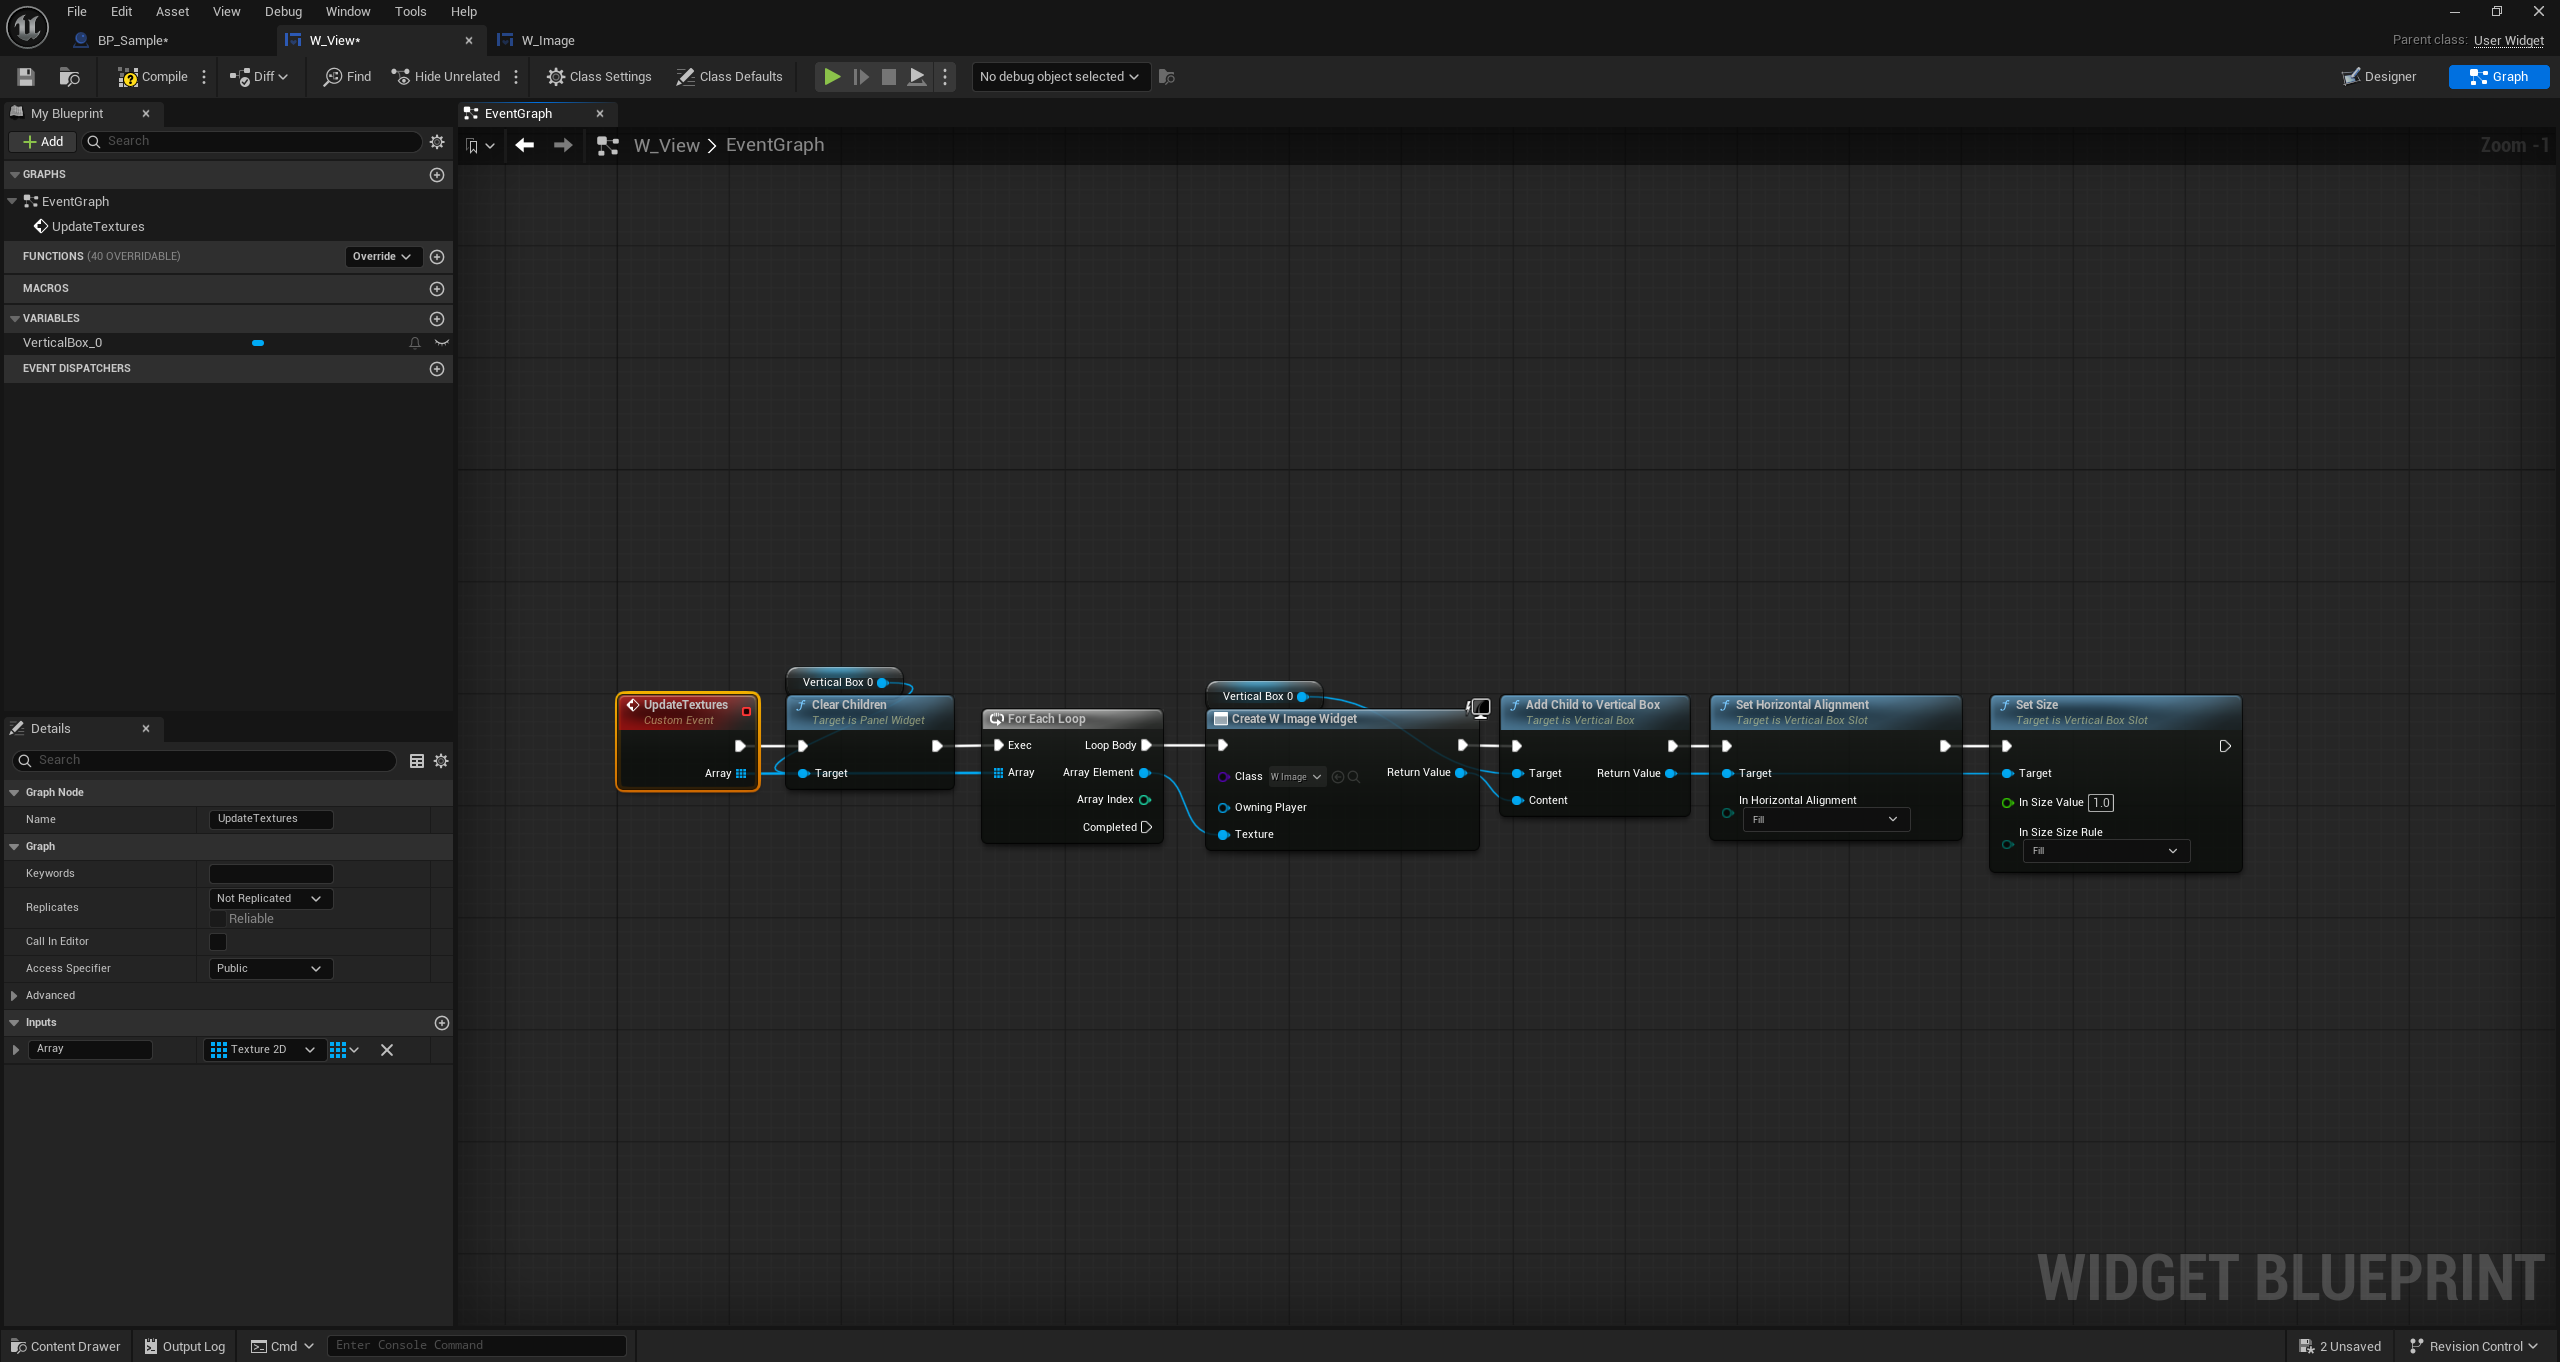
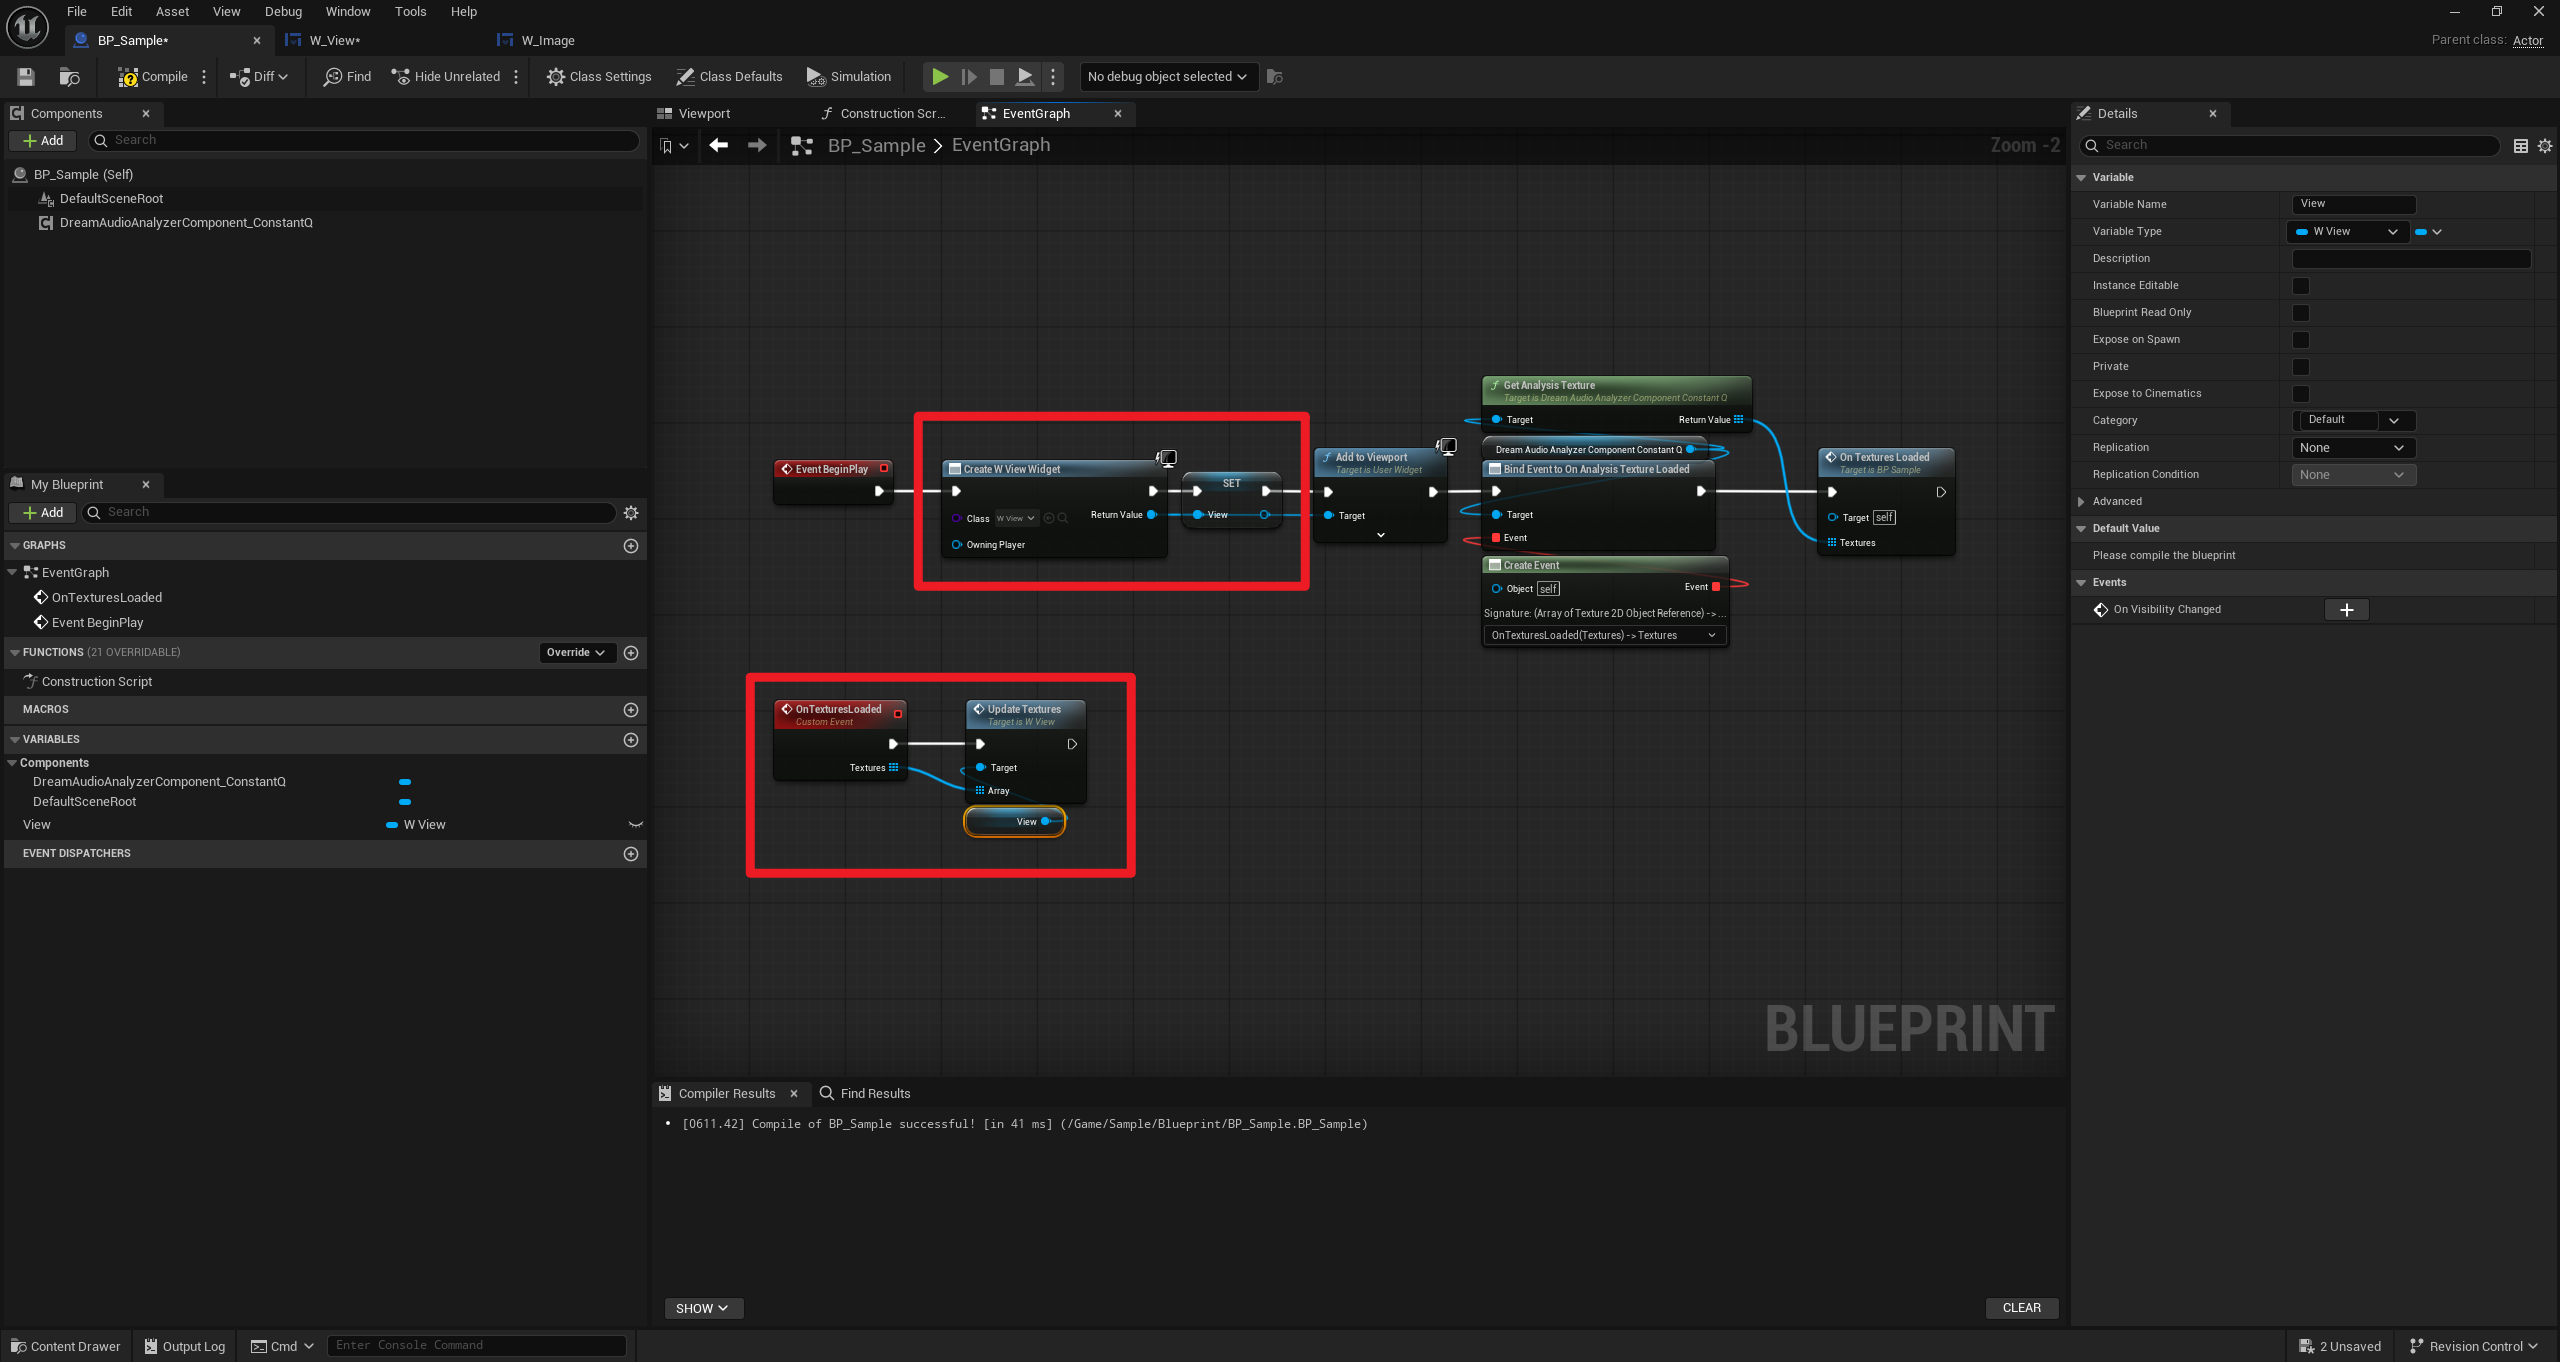
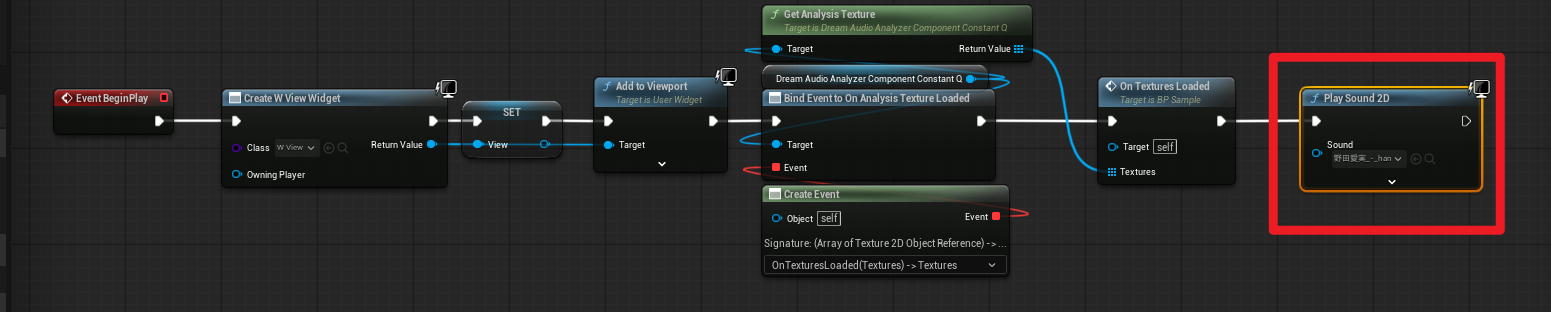
Build the UMG UI
Follow the screenshots below to build the UI:
Modify Audio Assets
To ensure the analysis component receives audio input, specify an output Audio Bus on your audio assets.
This tutorial provides an editor script, ApplyListenAudioBus, which can batch-apply the built-in bus AB_DreamAudioListen_Channel_A to selected audio assets.
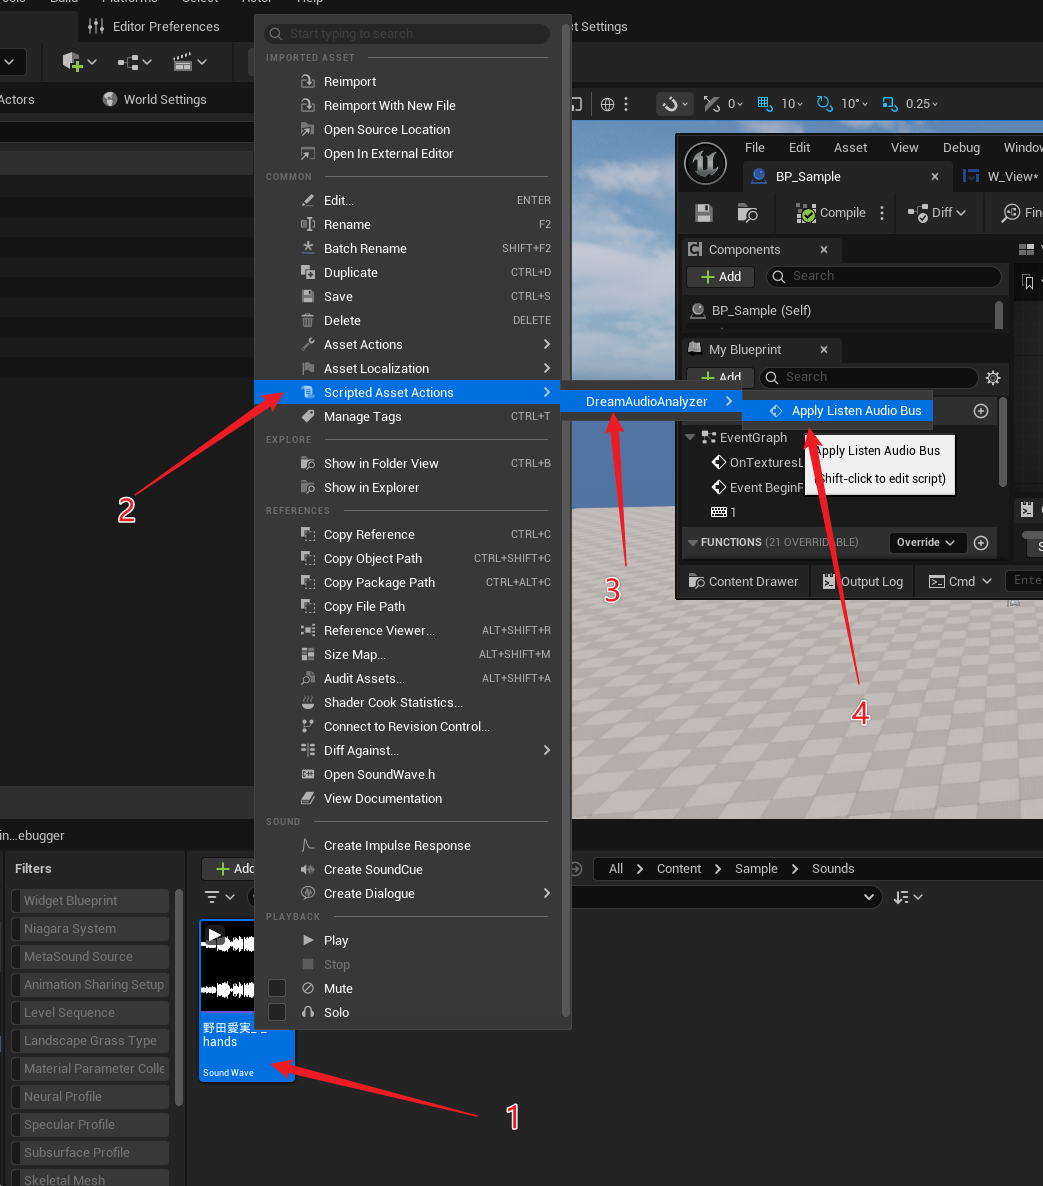
After running the script, the corresponding Audio Bus is automatically added to the related audio assets:
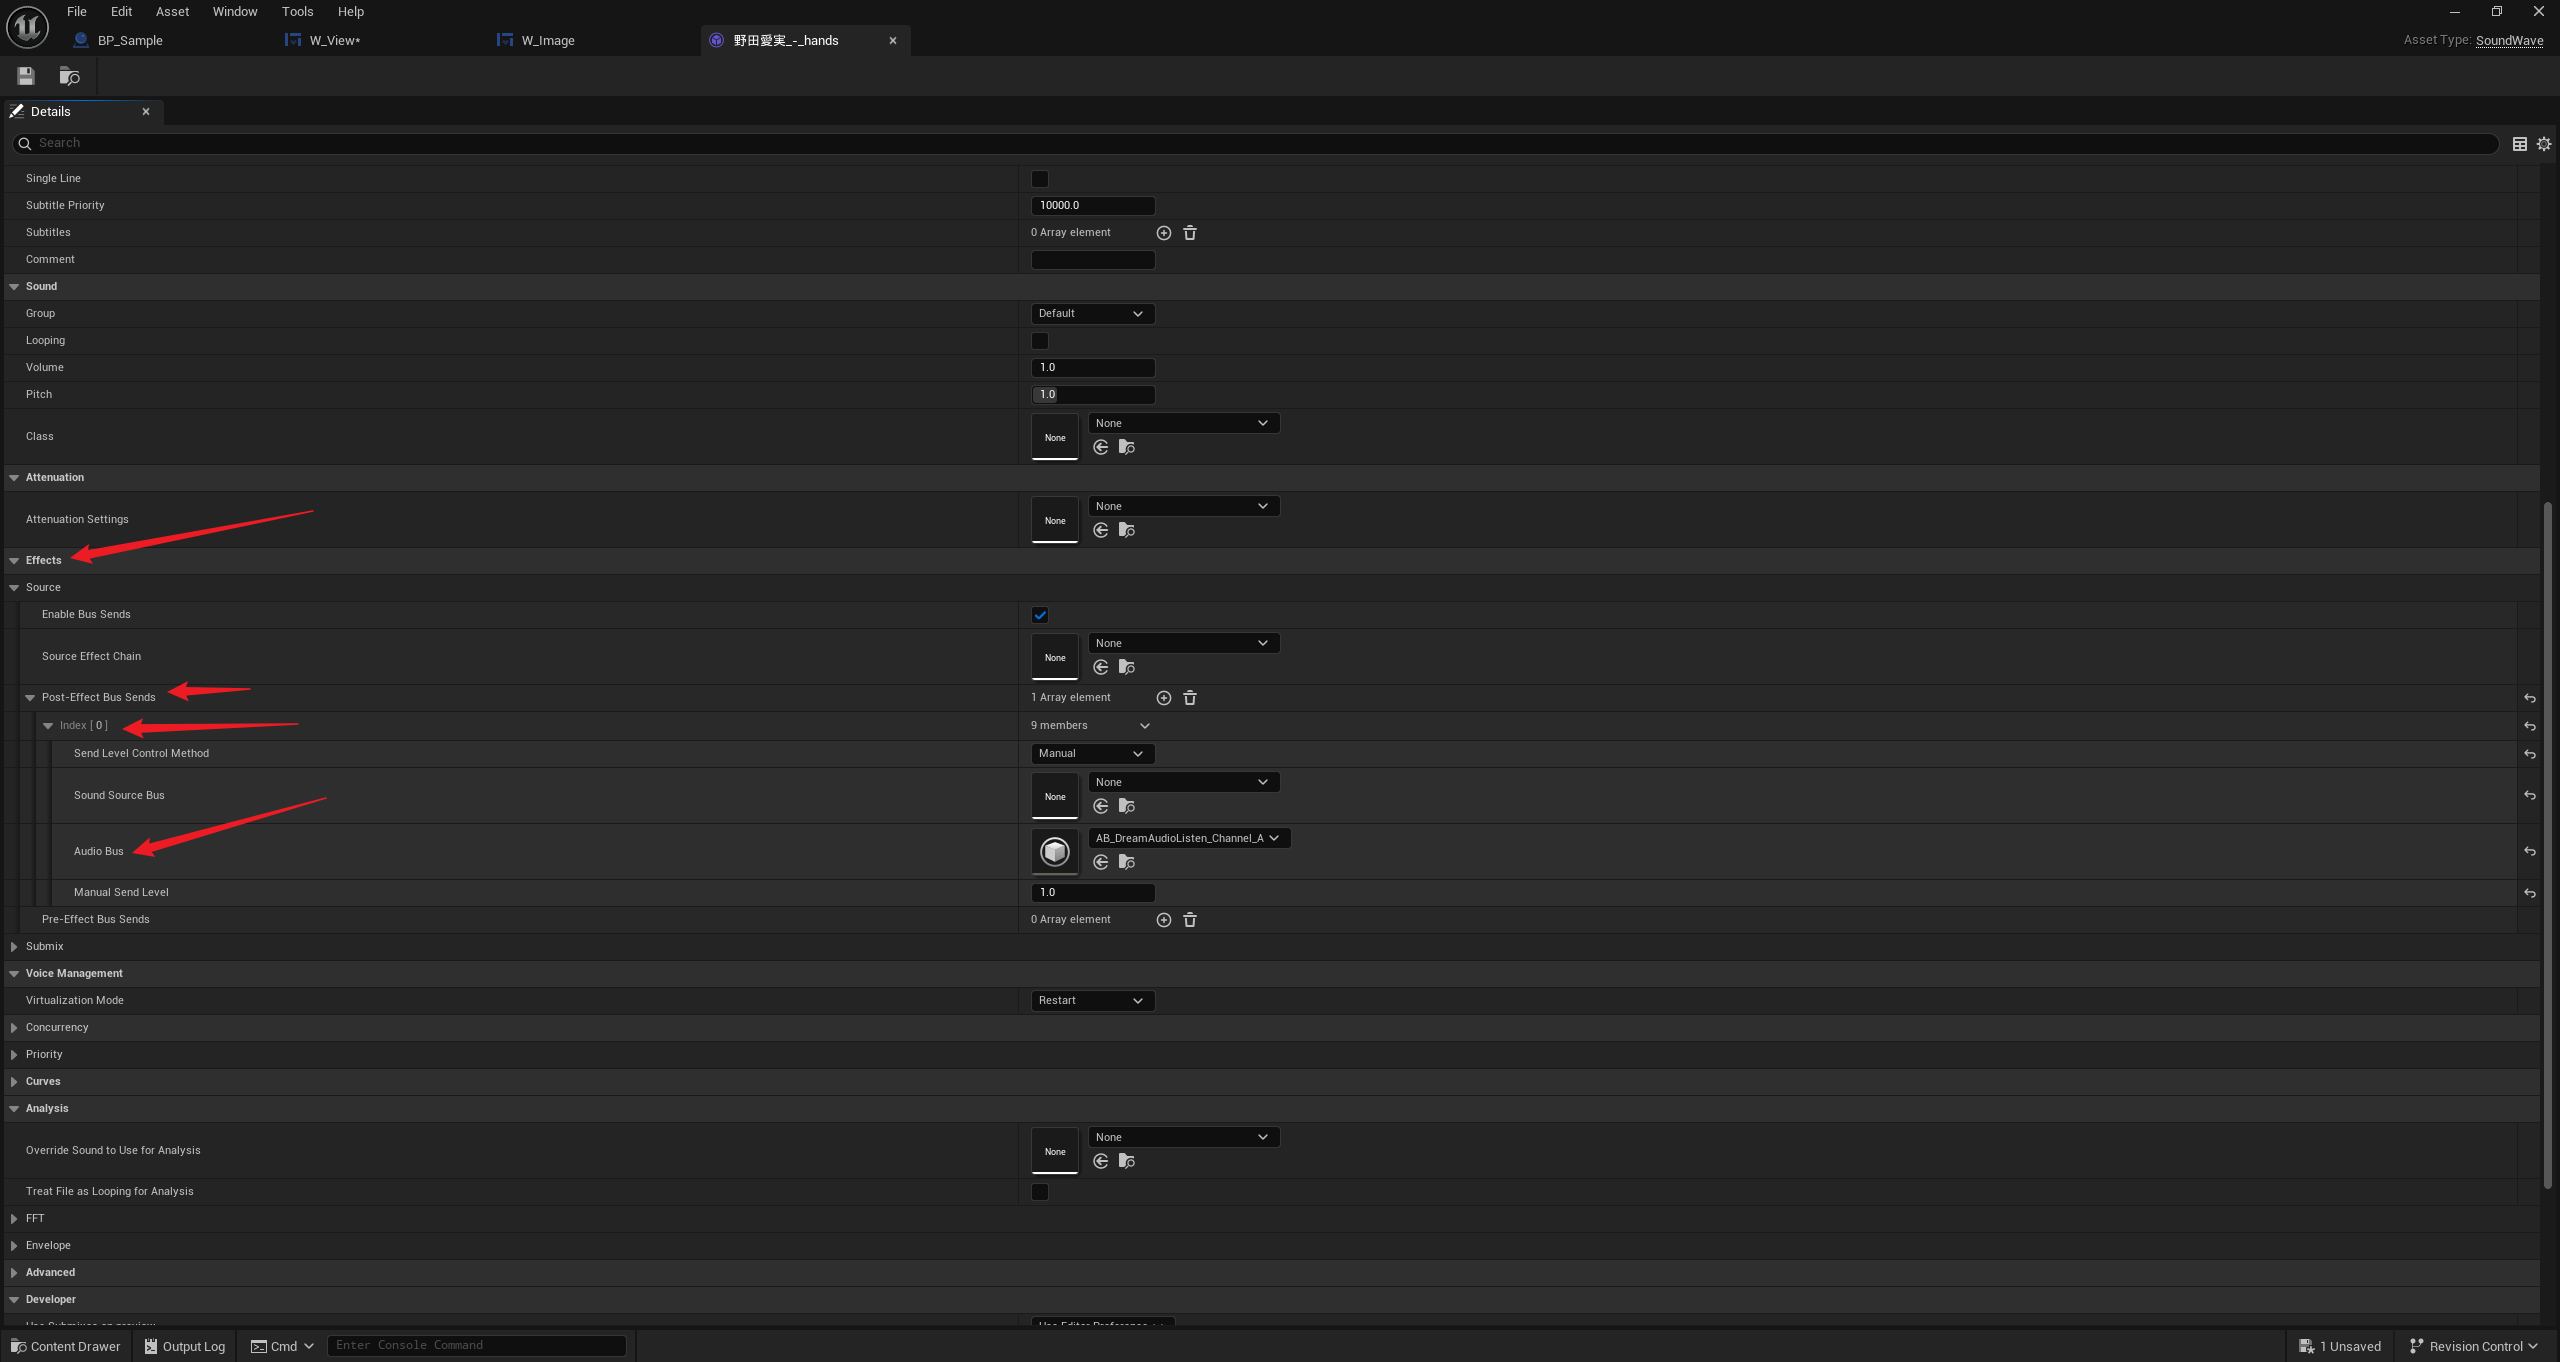
You can also add it manually or use your own bus.
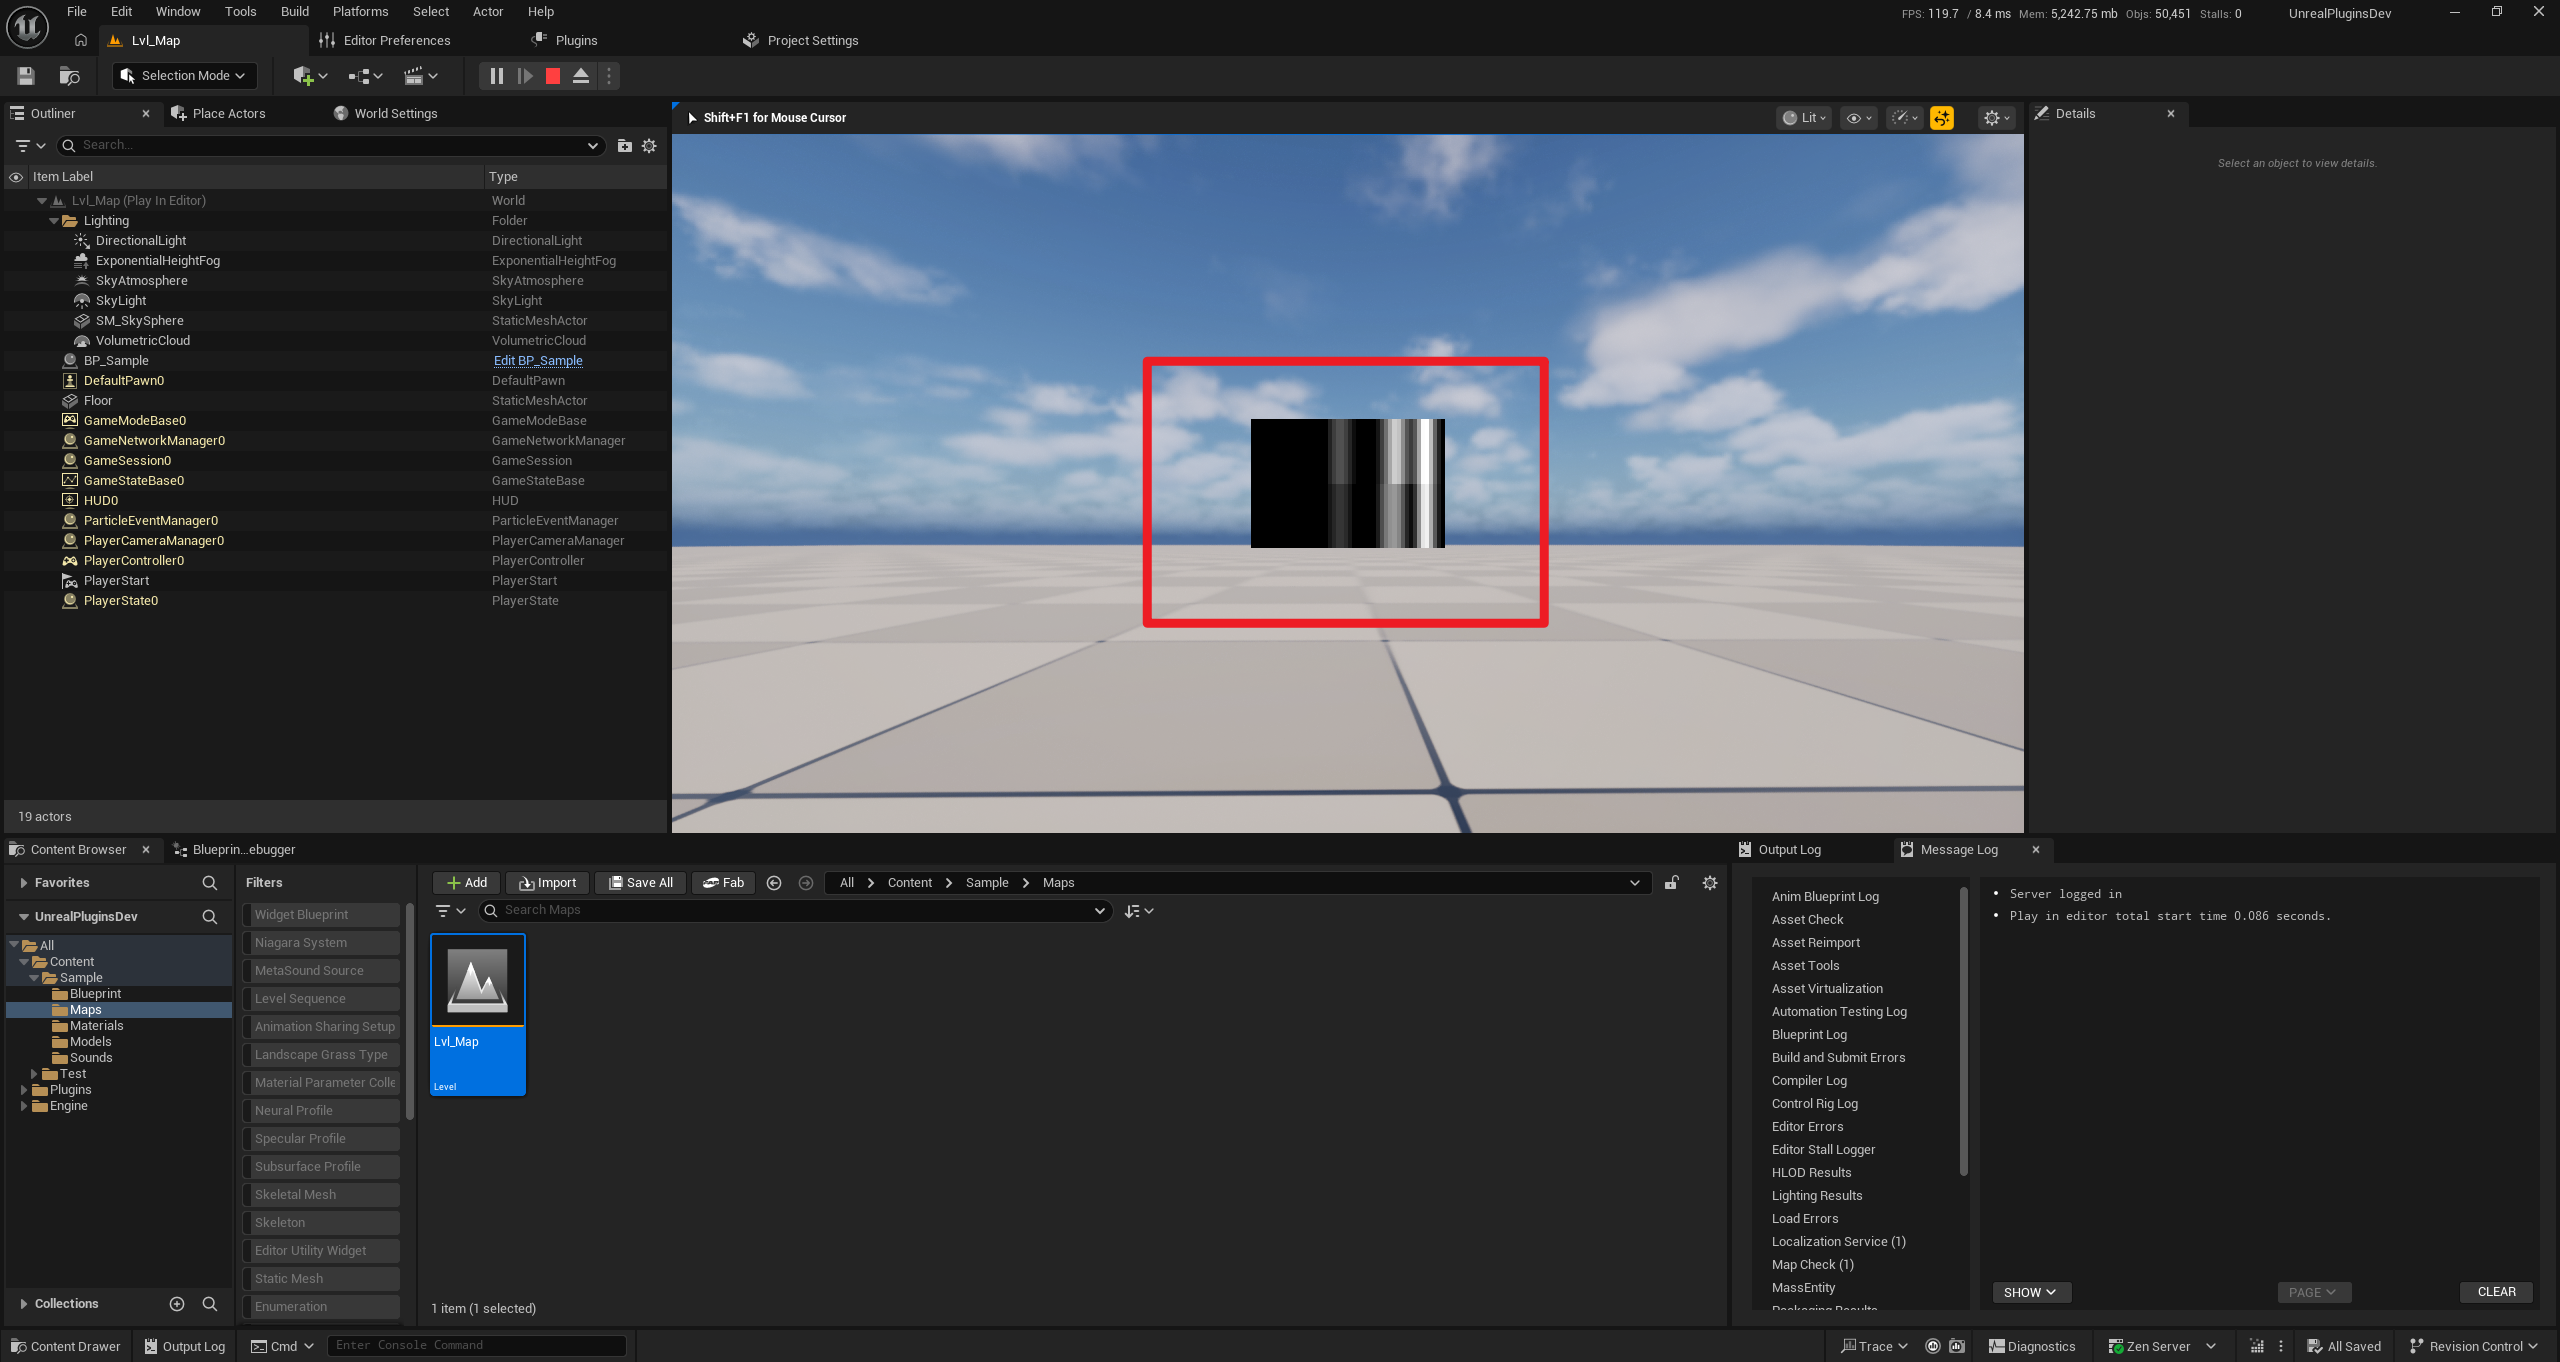
Preview
After completing the configuration above, run the game and you will see the real-time audio analysis UI in the center of the screen.
The image below shows the ConstantQ spectrum result:
Additional Resources
- Video Tutorial (TBD): Bilibili
- Video Tutorial (TBD): YouTube
Audio Visual Materials: GITHUB LINK
Tutorial Updated: 2026-03-03
Plugin Version: 1.0.0